
TL;DR — Skip the Article, Just Run This
Don’t want to read 2,000 words? Open Claude Code (or any AI coding assistant) and paste this:
Clone https://github.com/runaicode/lora-training-pipeline and set up the LoRA training pipeline for me. Check my GPU first.That’s it. Claude will clone the repo, check your hardware, estimate training time, and walk you through the entire process step by step. If your PC can’t handle it, it’ll set you up with a cloud GPU instead.
A complete guide to building an automated LoRA training pipeline — from thousands of raw photos to a working AI model, using hardware you probably already own.
What This Guide Covers
Most AI image generators create generic faces. But what if you want to generate photorealistic images of a specific real person — in any setting, any pose, any lighting? That requires training a custom model on their photos.
The problem is that most people do this badly. They dump 20 random photos into a training script, get blurry results that look nothing like the person, and conclude it doesn’t work.
This guide shows you how to do it right — with an automated pipeline that:
- Pulls thousands of source photos from cloud storage
- Uses computer vision to find and score every photo of the target person
- Detects professional color calibration charts for accurate skin tone reproduction
- Selects the optimal 30-50 training images with the right mix of angles and expressions
- Produces a training-ready dataset with unique per-image captions
- Trains a LoRA model that nails the person’s identity
The entire pipeline runs on a home PC. No cloud subscriptions, no expensive hardware.
The Two Approaches: LoRA vs Full Fine-Tuning
Before we start, you need to understand there are two paths to custom AI photo generation. Which one you choose depends on your hardware and budget.
Path 1: LoRA (Low-Rank Adaptation) — Home PC Friendly
| Aspect | Details |
|---|---|
| What it does | Adds a small “adapter” to an existing AI model that encodes the person’s identity |
| Training images | 30–50 carefully selected photos |
| Hardware needed | 1 GPU with 8GB+ VRAM (RTX 3060, 3070, 4060, etc.) |
| Training time | 2–3 hours |
| Output size | ~200MB adapter file |
| Cost | $0 if you own a gaming PC |
| Quality | Excellent for faces and upper body |
LoRA works by only modifying a tiny fraction of the base model’s parameters (~2-4 million out of billions). This means it trains fast, needs little data, and produces a small portable file. The catch is that it has a ceiling — throw too many images at it (100+) and the identity gets diluted rather than improved.
Path 2: Full Fine-Tuning — Cloud GPU Required
| Aspect | Details |
|---|---|
| What it does | Modifies ALL parameters of the base model to deeply encode the person |
| Training images | 500–5,000+ photos |
| Hardware needed | 4-8 GPUs with 40-80GB VRAM each (A100, H100) |
| Training time | 1–3 days |
| Output size | 12–24GB full model checkpoint |
| Cost | $50-150 renting cloud GPUs (RunPod, Vast.ai, Lambda) |
| Quality | Superior for full body, varied poses, complex scenes |
Full fine-tuning rewrites the entire model to know this person. It produces better results for complex scenarios but requires serious compute. You don’t need to own the hardware — rent a multi-GPU server for 24-48 hours, upload your photos, train, download the result, and delete the server.
Cloud GPU Providers:
| Provider | GPU Options | Approx. Cost | Notes |
|---|---|---|---|
| RunPod | A100 80GB, H100 | $1-6/hr | Most popular for AI training |
| Vast.ai | Mixed marketplace | $0.50-3/hr | Budget option, variable quality |
| Lambda Labs | A100, H100 | $1-2/hr | Research-focused |
| Replicate | Managed | Pay per run | Easiest setup, higher per-run cost |
This guide focuses on Path 1 (LoRA) since it’s accessible to everyone with a gaming PC. The photo curation pipeline is the same for both paths — only the training step differs.
Phase 1: Photo Acquisition
What You Need
- Source photos: The more the better. We started with 3,000+ and selected 40. Having a large pool lets you be extremely picky about quality.
- A mix of shots: Face close-ups (70%), three-quarter angles (20%), and full body (10%)
- Multiple lighting conditions: Indoor, outdoor, warm light, cool light
- Multiple expressions: Neutral, smiling, laughing, serious
- A Calibrite ColorChecker Passport Photo (optional but highly recommended): Photograph it once per lighting setup for accurate color calibration
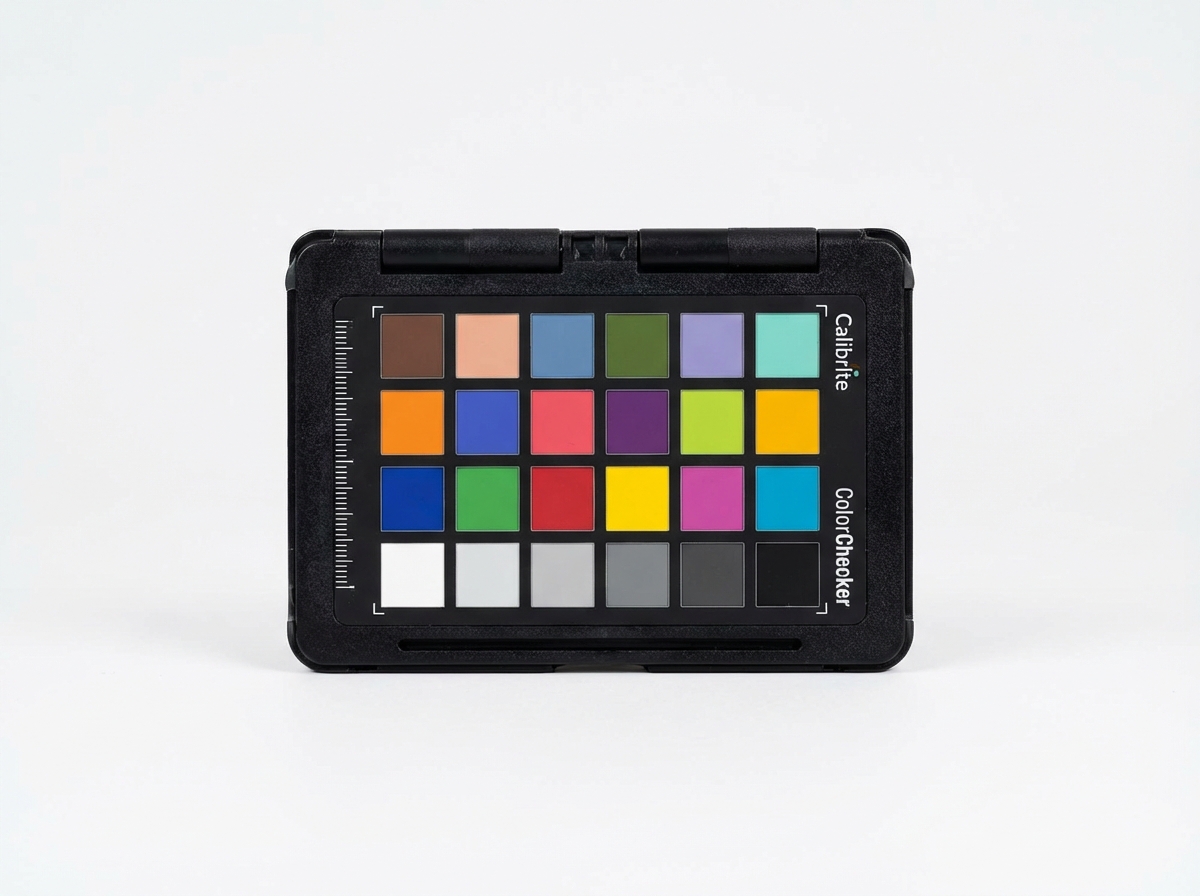
Calibrite ColorChecker Passport Photo 2
The industry standard for color accuracy. Professional photographers use this to ensure skin tones, clothing colors, and backgrounds look exactly right — regardless of lighting conditions. For AI training, it means your model learns the person’s actual appearance, not lighting artifacts.
Affiliate link — helps support RunAICode at no extra cost to you.
Source Photo Guidelines
| What Helps Training | What Hurts Training |
|---|---|
| Sharp, well-focused photos | Motion blur, out of focus |
| Varied angles (front, 3/4, profile) | All same angle |
| Varied expressions | All same expression |
| Clean backgrounds | Cluttered, busy backgrounds |
| Good lighting | Over/underexposed |
| RAW files (for color correction) | Low-quality compressed JPEGs |
| Color checker per lighting setup | Inconsistent color across shoots |
The Download Pipeline
If your photos are on Google Drive, the pipeline automates the download. You don’t need to do this manually — the repo’s CLAUDE.md tells Claude Code exactly how to run this for you. But here’s what’s happening under the hood:
# The pipeline's download script (scripts/download_gdrive.py) handles everything:
# 1. Takes your Google Drive folder URL
# 2. Extracts the folder ID automatically
# 3. Recursively scans all subfolders for images
# 4. Downloads JPG, PNG, RAW (ARW/CR2/NEF/DNG) — skips videos
# 5. Resumes interrupted downloads automatically

import urllib.request, urllib.parse, json

API_KEY = "your-google-drive-api-key"    # You provide this once
FOLDER_ID = "your-folder-id-from-url"    # Extracted from your Drive link

# List all files in the shared folder
params = {
    "q": f"'{FOLDER_ID}' in parents and trashed=false",
    "fields": "files(id,name,mimeType,size)",
    "pageSize": "1000",
    "key": API_KEY,
}
url = "https://www.googleapis.com/drive/v3/files?" + urllib.parse.urlencode(params)
response = urllib.request.urlopen(url)
files = json.loads(response.read())["files"]

# Filter for images only (supports RAW formats too)
IMAGE_EXTS = {".jpg", ".jpeg", ".png", ".arw", ".cr2", ".nef", ".dng", ".raw"}
images = [f for f in files if any(f["name"].lower().endswith(ext) for ext in IMAGE_EXTS)]

# Download each image to the local downloads/ folder
for img in images:
    download_url = f"https://www.googleapis.com/drive/v3/files/{img['id']}?alt=media&key={API_KEY}"
    urllib.request.urlretrieve(download_url, f"downloads/{img['name']}")
Storage tip: Use a NAS or external drive. RAW photos from a professional camera are ~60MB each. 3,000 of them = ~180GB. Don’t try to process these on your boot drive.
Phase 2: Intelligent Photo Curation
This is where the magic happens. Instead of manually scrolling through thousands of photos, we use computer vision to automate the entire selection process. Again — Claude Code handles all of this for you. The code below explains what’s happening behind the scenes.
Phase 2, Step 1: Install Dependencies
# Claude Code runs this automatically, but here's what gets installed:
# - OpenCV for face detection and image analysis
# - NumPy for numerical operations
# - rawpy for processing RAW camera files (Sony ARW, Canon CR2, etc.)

pip install opencv-python-headless numpy rawpy

# Download the AI models used for face detection and recognition
mkdir -p models && cd models

# DNN face detector — more accurate than older Haar cascade method
curl -LO "https://raw.githubusercontent.com/opencv/opencv/master/samples/dnn/face_detector/deploy.prototxt"
curl -LO "https://raw.githubusercontent.com/opencv/opencv_3rdparty/dnn_samples_face_detector_20170830/res10_300x300_ssd_iter_140000.caffemodel"

# SFace recognition model — identifies WHO is in each photo
curl -LO "https://github.com/opencv/opencv_zoo/raw/main/models/face_recognition_sface/face_recognition_sface_2021dec.onnx"
Phase 2, Step 2: Build a Reference Identity
You need 10-20 photos where you’re certain the target person is the main subject. These become the “identity anchor” that the pipeline matches against.
import cv2
import numpy as np

# Load the face detection and recognition AI models
face_net = cv2.dnn.readNetFromCaffe(
    "models/deploy.prototxt",
    "models/res10_300x300_ssd_iter_140000.caffemodel"
)
face_recognizer = cv2.FaceRecognizerSF.create(
    "models/face_recognition_sface_2021dec.onnx", ""
)

def detect_faces(img, confidence_threshold=0.6):
    """Find all faces in an image using DNN detector.
    Returns list of (x, y, width, height, confidence) for each face found."""
    h, w = img.shape[:2]
    blob = cv2.dnn.blobFromImage(img, 1.0, (300, 300), (104, 177, 123))
    face_net.setInput(blob)
    detections = face_net.forward()

    faces = []
    for i in range(detections.shape[2]):
        conf = detections[0, 0, i, 2]
        if conf < confidence_threshold:
            continue
        x1 = int(detections[0, 0, i, 3] * w)
        y1 = int(detections[0, 0, i, 4] * h)
        x2 = int(detections[0, 0, i, 5] * w)
        y2 = int(detections[0, 0, i, 6] * h)
        faces.append((x1, y1, x2 - x1, y2 - y1, float(conf)))
    return faces

def get_embedding(img, face_bbox):
    """Extract a 128-dimension face fingerprint.
    This is like a unique ID for the person's face."""
    roi = np.array(face_bbox[:4], dtype=np.int32)
    aligned = face_recognizer.alignCrop(img, roi)
    return face_recognizer.feature(aligned)

# Build reference embeddings from your known-good photos
reference_embeddings = []
for photo_path in known_photos:
    img = cv2.imread(photo_path)
    faces = detect_faces(img)
    if faces:
        # Use the largest face in the photo (most likely the main subject)
        largest = max(faces, key=lambda f: f[2] * f[3])
        emb = get_embedding(img, largest)
        reference_embeddings.append(emb)
Phase 2, Step 3: Color Checker Detection
If you shoot with a Calibrite ColorChecker Passport Photo, the pipeline can detect it and compute a color correction matrix for each lighting setup. The ColorChecker has 24 standard color patches with known sRGB values. By comparing what the camera captured versus the known values, we compute a 3×3 matrix that corrects color across the entire shoot.
# Known sRGB reference values for the 24 classic ColorChecker patches
COLORCHECKER_SRGB = np.array([
    [115, 82, 68],     # Dark Skin
    [194, 150, 130],   # Light Skin
    [98, 122, 157],    # Blue Sky
    [87, 108, 67],     # Foliage
    # ... (all 24 patches defined in the full script)
    [243, 243, 242],   # White
    [52, 52, 52],      # Black
], dtype=np.float64)

def compute_color_correction(measured_patches, reference_patches):
    """Compute a 3x3 Color Correction Matrix using least squares.
    This transforms camera colors → accurate sRGB colors."""
    ccm, _, _, _ = np.linalg.lstsq(measured_patches, reference_patches, rcond=None)
    return ccm

def apply_correction(image_rgb, ccm):
    """Apply the correction to every pixel in an image.
    Result: accurate skin tones regardless of lighting conditions."""
    pixels = image_rgb.reshape(-1, 3).astype(np.float64)
    corrected = np.clip(pixels @ ccm, 0, 255).astype(np.uint8)
    return corrected.reshape(image_rgb.shape)
Why this matters for AI training: Without color correction, the model learns the lighting artifacts (orange skin from tungsten, blue tint from shade) instead of the person’s actual appearance. With correction, skin tones are accurate and consistent across all training images.
Phase 2, Step 4: Score and Rank Every Photo
For each photo that matches the target person, we compute a quality score based on sharpness, lighting, face size, and angle:
def score_image(img, face_bbox, match_score):
    """Score a photo on 4 quality factors. Higher = better for training."""
    h, w = img.shape[:2]
    x, y, fw, fh = face_bbox[:4]

    # 1. SHARPNESS — Laplacian variance (higher = sharper image)
    gray = cv2.cvtColor(img, cv2.COLOR_BGR2GRAY)
    sharpness = cv2.Laplacian(gray, cv2.CV_64F).var()

    # 2. LIGHTING — histogram spread (wider = better exposed)
    hist = cv2.calcHist([gray], [0], None, [256], [0, 256]).flatten()
    hist = hist / hist.sum()
    mean = np.average(range(256), weights=hist)
    std = np.sqrt(np.average((np.arange(256) - mean)**2, weights=hist))
    lighting = min(1.0, std / 80.0)

    # 3. FACE SIZE — larger face in frame = more detail for training
    face_ratio = (fw * fh) / (w * h)

    # 4. FACE ANGLE — estimated from the face bounding box aspect ratio
    aspect = fw / max(fh, 1)
    angle = "front" if aspect > 0.85 else "three_quarter" if aspect > 0.65 else "profile"

    # Weighted composite score
    composite = (
        min(sharpness / 500, 1.0) * 0.3 +   # 30% sharpness
        max(0, lighting) * 0.2 +              # 20% lighting quality
        min(face_ratio * 20, 1.0) * 0.3 +    # 30% face size
        (1.0 - match_score) * 0.2             # 20% identity match
    )

    return composite, angle
Phase 2, Step 5: Select with Diversity
Don’t just take the top 40 by score — you need angle diversity. A model trained entirely on front-facing photos can only generate front-facing images.
# Target distribution for a balanced training set
TARGET = {"front": 15, "three_quarter": 10, "profile": 5}  # = 30 face shots
BODY_SHOTS = 8  # Full body shots where face is small in frame
# Total: 38 training images

selected = []
angle_counts = {"front": 0, "three_quarter": 0, "profile": 0}

# Pick face shots — highest scoring first, but respect the angle quotas
for candidate in sorted(all_candidates, key=lambda x: x["score"], reverse=True):
    angle = candidate["angle"]
    if angle_counts[angle] < TARGET[angle]:
        selected.append(candidate)
        angle_counts[angle] += 1
    if sum(angle_counts.values()) >= 30:
        break

# Add body shots (face is small relative to image — teaches body proportions)
body_candidates = [c for c in all_candidates if c["face_ratio"] < 0.05]
selected.extend(sorted(body_candidates, key=lambda x: x["score"], reverse=True)[:BODY_SHOTS])
Phase 2, Step 6: Crop, Convert, and Caption
Each selected image gets cropped, resized, color corrected, and captioned:
- Cropped to head+shoulders (face shots) or full-body framing (body shots)
- Resized to 1024×1024 pixels (FLUX native resolution)
- Color corrected using the shoot’s ColorChecker data (if available)
- Saved as lossless PNG
- Captioned with a unique text file describing the image
training-set/
├── subject_001_cc.png
├── subject_001_cc.txt    → "subject_name, front-facing portrait, well-lit"
├── subject_002.png
├── subject_002.txt       → "subject_name, three-quarter view, natural lighting"
├── subject_038.png
├── subject_038.txt       → "subject_name, full body, casual outfit, outdoor"
└── ...
The captions are critical. This is the #1 reason most LoRA training fails. If every image has the same caption (or no caption), the model can’t learn what makes each photo unique. Unique per-image captions tell the model: “this trigger word + front-facing = this look, this trigger word + profile = this look.”
Phase 3: Training
LoRA Training on a Home GPU
Hardware requirements:
- NVIDIA GPU with 8GB+ VRAM (RTX 3060/3070/4060 or better)
- CUDA 11.8+ installed
- 16GB+ system RAM
- ~10GB free disk space
Software setup (Claude Code installs this for you):
# Create an isolated Python environment
python -m venv lora-env
source lora-env/bin/activate

# Install PyTorch with CUDA support (for NVIDIA GPUs)
pip install torch torchvision --index-url https://download.pytorch.org/whl/cu118

# Install the AI training libraries
pip install diffusers transformers accelerate peft
pip install bitsandbytes  # Cuts memory usage in half
Key training parameters for faces:
| Parameter | Recommended Value | Notes |
|---|---|---|
| Base model | FLUX.1-dev | Best current open model for photorealism |
| LoRA rank | 32–48 | Higher = more capacity for facial detail. 16 is too low for faces. |
| Learning rate | 4e-5 | Lower is safer. 1e-4 causes model collapse. |
| Training steps | 800–1500 | With 40 images: ~20-35 epochs |
| Batch size | 1 | Limited by 8GB VRAM |
| Resolution | 1024×1024 | FLUX native |
| Train text encoder | Yes | Critical for caption-triggered generation |
| Optimizer | AdamW 8-bit | Memory efficient |
| Checkpoints | Every 200 steps | So you can pick the best stopping point |
| Trigger word | Unique name (e.g., “subject_face”) | Activates the identity in prompts |
Training time: ~2-3 hours on an RTX 3070 Ti (8GB)
Output: A single .safetensors file (~150-300MB) that plugs into any FLUX-compatible image generator.
Full Fine-Tuning on Cloud GPUs
If you want to go bigger with 500+ images:
# On your rented cloud server (RunPod, Vast.ai, etc.):

# Upload your photo dataset
rsync -avz training-set/ user@cloud-server:/workspace/training-set/

# Training takes 12-48 hours depending on dataset size and GPU count
# Output: 12-24GB model checkpoint

# Download the finished model
rsync -avz user@cloud-server:/workspace/output/ ./model-output/
Typical cloud training session:
- Rent a 4x A100 server ($6/hr)
- Upload 100GB of photos (~1 hour)
- Train for 24 hours (~$144)
- Download 20GB model (~30 min)
- Delete server
- Total: ~$150-200 for a one-time training
The Training Image Cheat Sheet
| Parameter | Recommendation | Why |
|---|---|---|
| Total images | 30–50 for LoRA, 500+ for full fine-tune | LoRA sweet spot; more = dilution |
| Face close-ups | 25–35 (LoRA) | Primary identity anchor |
| Full body | 5–8 (LoRA) | Body proportions and style |
| Front-facing | 40% of face shots | Most important angle |
| Three-quarter | 30% of face shots | Adds dimensional understanding |
| Profile | 15% of face shots | Jawline, nose, ears |
| Expressions | Mix across set | Prevents expression lock-in |
| Lighting | Mix across set | Prevents lighting bias |
| Resolution | 1024×1024 (FLUX) | Model’s native resolution |
| Format | PNG (lossless) | No compression artifacts |
| Captions | Unique per image | #1 quality factor |
| Color checker | 1 per lighting setup | Accurate skin tones |
| Source pool | As large as possible | Bigger pool = pickier selection |
What Kills Training Quality
- Identical captions — Model can’t distinguish photos, collapses to average
- All same angle — Model only generates that one pose
- Blurry photos — Garbage in, garbage out
- Too many images for LoRA — 100+ causes identity averaging
- Low LoRA rank — Use 32-48 for faces, never 16
- Skipping text encoder — Captions won’t trigger properly
- Learning rate too high — Model collapses, generates noise
What You Get at the End
A single model file (200MB for LoRA, 12-24GB for full fine-tune) that plugs into any compatible image generation workflow. Open a prompt box and type:
- “subject_face, professional headshot, studio lighting, white background”
- “subject_face, casual outdoor portrait, golden hour, city street”
- “subject_face, full body, elegant outfit, event photography”
Each generation takes 10-30 seconds on a consumer GPU. Unlimited images. Runs entirely locally — no cloud, no subscriptions, no per-image fees.
The total cost: $0 if you own a gaming PC (LoRA path), or $150-200 for a one-time cloud GPU rental (full fine-tune path). Either way, it’s a fraction of what a single professional photo shoot costs, and you can generate images forever.
Tools used: Python, OpenCV, SFace Recognition, Google Drive API, rawpy, diffusers
Compatible base models: FLUX.1-dev, Stable Diffusion XL, SD 1.5
Recommended hardware: Any NVIDIA GPU with 8GB+ VRAM